

 MCP
Channels are shared across Trophy. The domain and push providers you set up
here are also used by legacy emails and legacy push
notifications, so you only need to set them up
once.
1
A verified sending domain
Verify your domain on the Emails tab. See domain
verification below.
2
An email address for each user
Set the
email attribute when you identify
users. Users without an email address, or
who have unsubscribed, aren’t sent emails.Domain verification
Trophy supports sending emails from your own domain out-of-the-box. There are two ways to set this up, Single Sender Verification and DNS Verification. All domain settings are on the Emails tab of the Channels page in the Trophy dashboard.Sender Verification
Quickly verify a single email address
DNS Verification
Recommended for production use
Sender verification (basic)
Sender Verification is a quick way to verify a single email address that you want to use with Trophy without needing to change any code or DNS settings. Enter the email address, from name and reply-to email that you’d like Trophy to use when sending emails: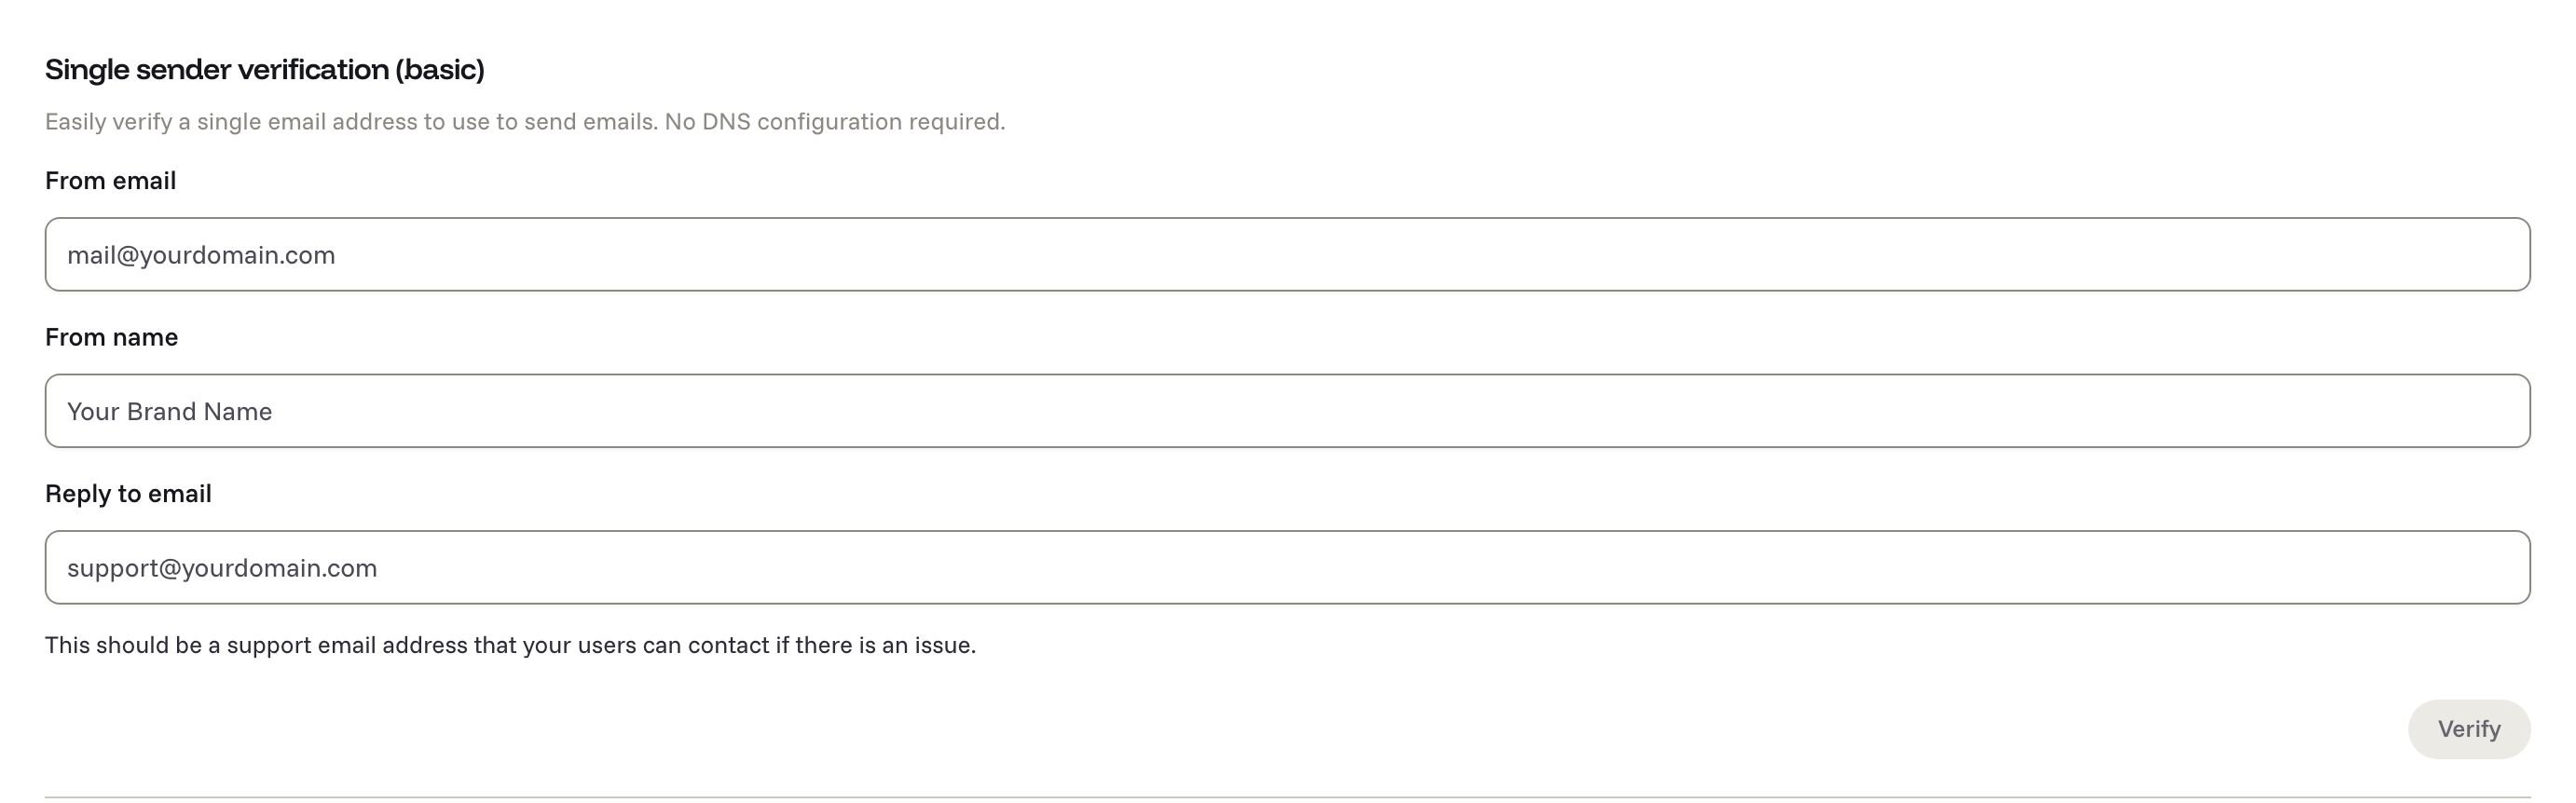
The email you receive will come from our email provider, Postmark. So keep an
eye out for ‘Postmark Support’ in your inbox!
DNS verification (advanced)
For production use we recommend DNS Verification. Once set up, this allows you to configure Trophy to send emails from any address on your domain. So if you want to change the address in future, you won’t need to verify again. Completing DNS verification also gives you the full benefits of any existing domain reputation and is the best way to make sure your emails avoid the spam folder. This does however require adding a couple of new entries into your DNS to allow Trophy to verify you own the domain. Follow the steps below to set up DNS verification:1
Head to the Channels page
Open the Emails tab of the Channels page. This is where you’ll configure everything related to the email domain Trophy will use to send emails on your behalf.
2
Configure your domain
Head down to the DNS Verification section and enter the domain you want to set up with Trophy.You can also configure a custom Return Path. This is where Trophy will forward notifications of bounced emails to help you investigate deliverability issues: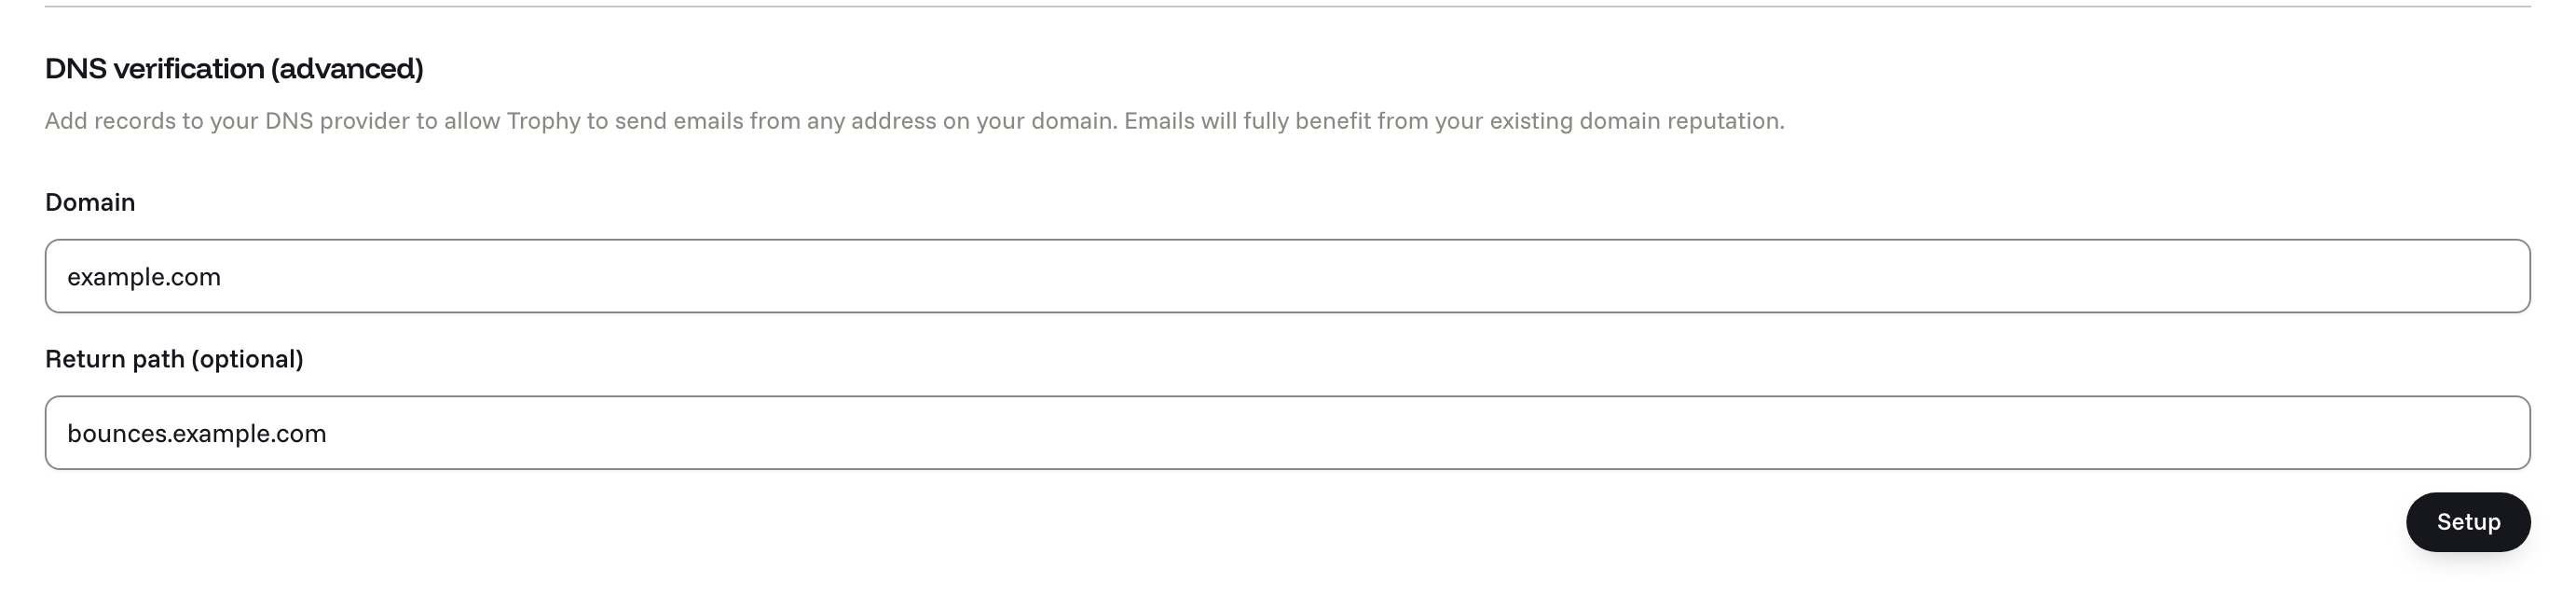
3
Set up your DNS records
Once you’ve entered your email domain, Trophy will provide you with details for two new DNS records that you’ll need to add to your DNS provider.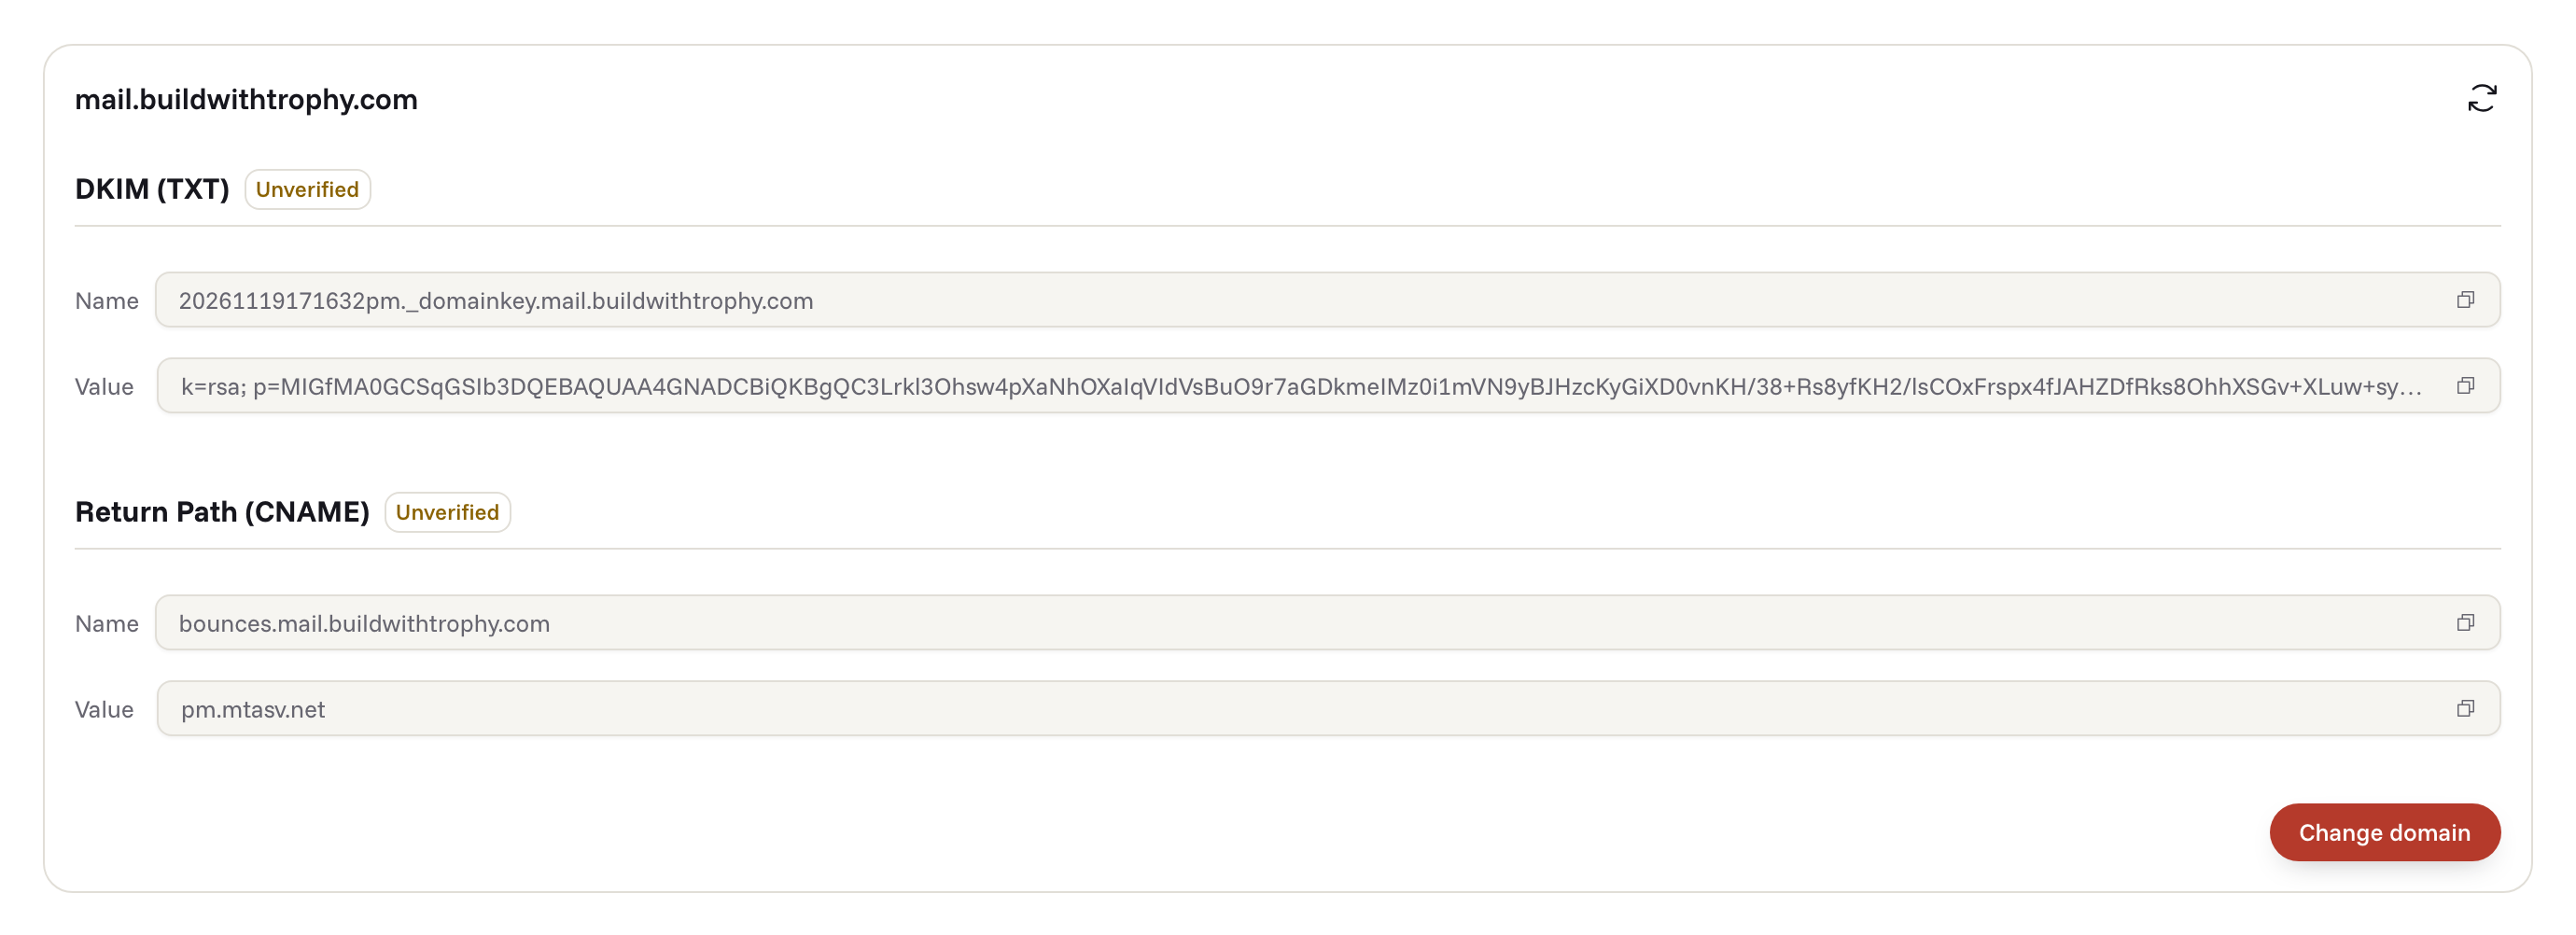
- First is the DKIM record which is used by inbox providers like Google to verify the authenticity of emails. Enter the name and value provided as a new TXT record in your DNS provider.
- Second is the Return Path record. This is used to forward notifications of email bounces to your domain. Enter the name and value provided as a new CNAME record in your DNS provider.
Cloudflare
Cloudflare
NameCheap
NameCheap
4
Verify DNS records
Once you’ve added the two records into your DNS settings, click the refresh icon and Trophy will attempt to verify the records for you.Usually Trophy can verify records within a few minutes but bear in mind that DNS changes can take up to a few hours to fully propagate.If you see the following alert, the records may not have propagated yet, or there may be an issue with your setup. Once you’re sure everything’s set up correctly in your DNS provider, click refresh and Trophy will attempt to verify your DNS records once again.As soon as you see the following message, you know everything’s verified:

5
Configure your sending address
Once your DNS records are verified, it’s time to choose the email address you want to send emails from. Note that now you’ve fully verified your domain, you can change this address whenever you like without impacting deliverability.Simply enter the email address you want Trophy to send from, the name to show to users in the inbox when they receive emails and a support email address they can use to contact you if needed: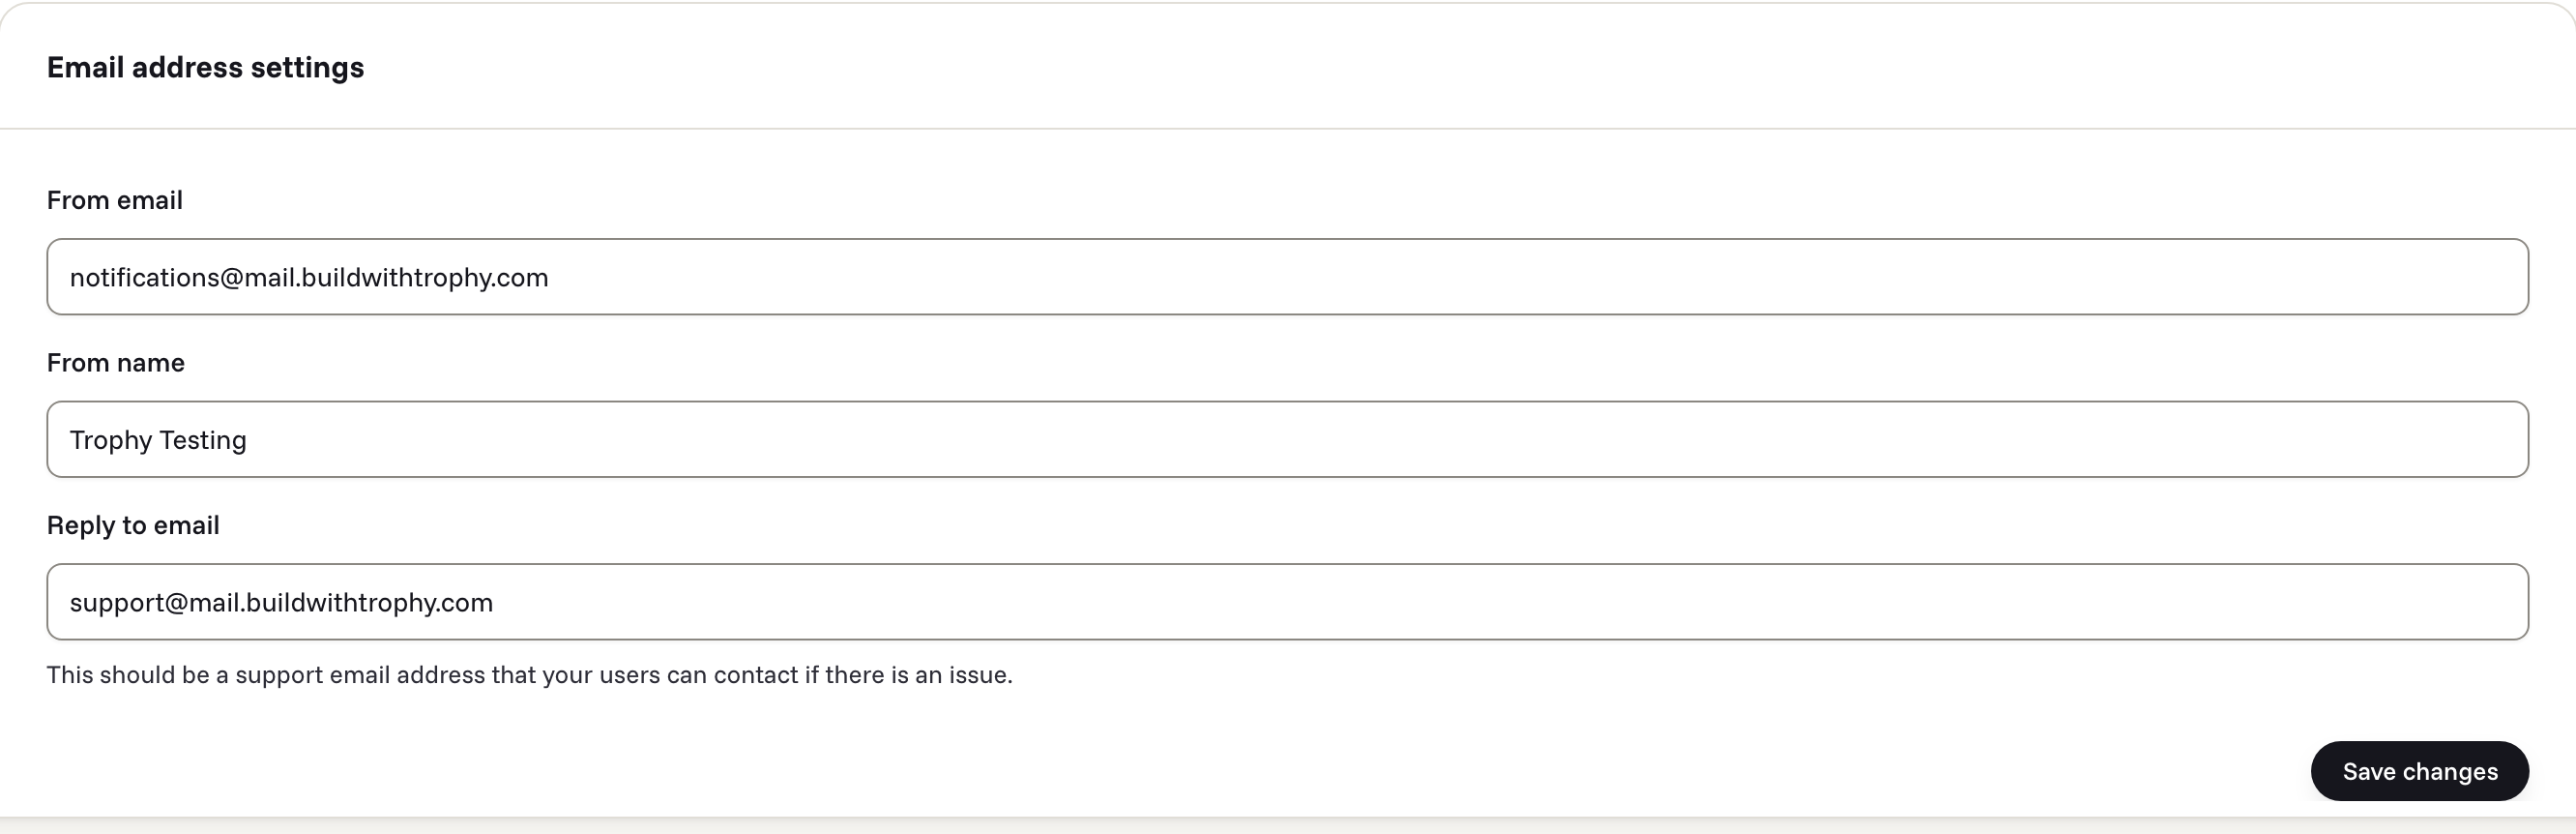
Push notifications
Trophy delivers push notifications natively through your own push setup. To send push notifications, Trophy needs:1
A configured push provider
Add your provider’s credentials on the Push tab. See supported
providers below.
2
Device tokens for each user
Associate device tokens with each user when you identify them or send metric
events. See device tokens below.
Supported providers
Trophy supports sending push notifications through 3 providers, which can all be configured on the Push tab of the Channels page in the Trophy dashboard.Apple Push Notification Service (APNs)
Trophy supports sending push notifications to users via APNs through a certificate-based connection. To send push notifications using APNs, you’ll need to provide Trophy with the following credentials from your Apple Developer Account:- APN Signing Key: Trophy uses this to securely send notifications via APNs
- Team ID: The team ID of your Apple Developer Account
- Key ID: The ID of your APNs authentication key
- Bundle ID: Your app’s unique bundle identifier
For more information on how to configure certificate-based connection to APNs
from a third-party service, read the official setup
guide.
Firebase Cloud Messaging (FCM)
Trophy supports sending push notifications to users via FCM. To achieve this you’ll need to provide Trophy with your Firebase Service Account JSON in the following format:FCM Service Account JSON
For more information on Firebase service accounts and how to authenticate
external services to use FCM, read the official service accounts
guide.
Expo Push Service
Trophy supports sending push notifications to users via Expo Push Service. Expo Push Service saves you having to integrate with FCM and APNs individually and automatically directs notifications through the relevant service based on your users platform. To achieve this you must provide Trophy with a few key details from your Expo account:- Expo Project Name: The name of your Expo project
- Expo Push Token: Your authentication token for sending notifications via Expo (required if using enhanced security).
For more information on Expo Push Service and how to authenticate external
providers, see the official
guide.
Device tokens
To send notifications to users, Trophy needs to know the unique tokens assigned to their devices. You tell Trophy about devices by associating device tokens with each user you identify. Trophy will use the device tokens you associate with each user when communicating with your push provider to route notifications to the correct device. To associate a device token with a user in Trophy, either assigndeviceTokens when identifying users explicitly, or when sending metric events.
Here’s how to associate device tokens when identifying users: